Loading...
Docker 环境搭建可参考 Docker 学习
Minio
- docker pull minio/minio
- 新建
/data/container/minio目录,并在minio目录下新建config(配置文件映射)db(文件存储映射) 和docker-compose.yml文件
name: minio
services:
  minio:
    image: minio/minio
    container_name: minio
    restart: always
    environment:
      - TZ=Asia/Shanghai
      - MINIO_ROOT_USER=jsonq
      - MINIO_ROOT_PASSWORD=180375jijao
    ports:
      - 9000:9000
      - 9999:9999
    volumes:
      - ./db:/data
      - ./config:/root/.minio
command: minio server /data --console-address ":9999"- 启动容器
docker compose up -d - 可以运行
docker compose logs -f查看运行日志
由于有网络桥接,在每次启动容器时,先
systemctl restrat docker重启 docker 服务。
此时可以访问 http://ip:9999,前提是安全组和防火墙放行 9999 端口
Nginx
- docker pull nginx,若对镜像大小有要求,可使用
nginx:alpine - nginx:latest 约 200M,nginx:alpine 约 50M
新建 /data/container/nginx 文件夹,并在 nginx 目录下新建 docker-compose.yml 文件,写入以下内容
services:
  nginx:
    image: nginx # nginx:alpine
    container_name: nginx
    restart: always
    ports:
      - 80:80
      - 443:443
    volumes:
      - ./html:/usr/share/nginx/html
      - ./logs:/var/log/nginx
      # - ./nginx.conf:/etc/nginx/nginx.conf  # dcoker 不支持文件挂载
      - ./conf.d:/etc/nginx/conf.d # conf.d 下的 *.conf 会被识别成 nginx 配置文件
      - ./default.d:/etc/nginx/default.d
    environment:
      - TZ=Asia/Shanghai
    privileged: true # 解决nginx的文件调用的权限问题
dcoker 只支持挂载文件夹,所以 /etc/nginx/nginx.conf 无法映射本地目录,会报错,需要提前拷贝出来
docker cp 容器id或名称:/etc/nginx/nginx.conf ./nginx.conf新建 test.conf 配置文件
docker 默认安装的 nginx 是没有配置 80 服务的,所以我们需要去本机的 conf.d 文件夹(映射的就是容器 /etc/nginx/conf.d)下新建 test.conf 文件,这个 test 随便什么名字都行,写入以下内容,只要是 .conf 结尾能让 nginx 识别到就行。
server {
    listen 80;
    server_name localhost;

    location / {
        # 注意,这里必须是容器的目录地址,而非宿主机的本地目录
        root /usr/share/nginx/html;
        index index.html;
    }
}
由于我们将本地的 ./html 和容器的 /usr/share/nginx/html 做映射,所以直接在 html 文件夹下新建 index.html,写入点东西,保存,docker restart [容器id或名字],访问 ip 地址即可看到 html 内容。
acme
- docker pull neilpang/acme.sh
- cd /data/container && mkdir acme
新建 docker-compose.yml,去阿里云 申请一个子账户,勾选权限策略 AliyunDNSFullAccess - 管理云解析(DNS)的权限,会生成 id 和 Secret,一定要保存好,仅有一次查看机会
services:
  acme-sh:
    image: neilpang/acme.sh
    container_name: acme
    restart: always
    command: daemon
    environment:
      - Ali_Key="你的 AccessKeyId"
      - Ali_Secret="你的 AccessKeySecret"
    volumes:
      - ./acme:/acme.sh
network_mode: host- 注册邮箱(感觉没什么用):
docker exec acme --register-account -m ccc@xx.xxx - 注册证书:
docker exec acme --issue --dns dns_ali -d jsonq.top -d *.jsonq.top- 如果网络执行较慢,第二步可以添加
--server https://acme-v02.api.letsencrypt.org/directory
- 如果网络执行较慢,第二步可以添加
执行成功后,会显示证书的路径,如下所示
[Sun Jan 26 06:27:52 UTC 2025] Your cert is in: /acme.sh/jsonq.top_ecc/jsonq.top.cer
[Sun Jan 26 06:27:52 UTC 2025] Your cert key is in: /acme.sh/jsonq.top_ecc/jsonq.top.key
[Sun Jan 26 06:27:52 UTC 2025] The intermediate CA cert is in: /acme.sh/jsonq.top_ecc/ca.cer
[Sun Jan 26 06:27:52 UTC 2025] And the full-chain cert is in: /acme.sh/jsonq.top_ecc/fullchain.cer
如果没成功,建议删除镜像重新拉取执行命令
注意事项
不同的运营商的 DNS API 不一样,这里使用 阿里云,则是 dns_ali,如果是其它运营商,请参考 How to use DNS API 来配置 key
*.jsonq.top这里的*就代表泛域名
执行完毕命令之后,就可以看到在 acme 目录下,将容器的 acme.sh 文件内容全都映射出来了
定时任务更新证书
安装自动更新脚本
docker exec acme --upgrade --auto-upgrade在 docker 宿主机添加一条定时任务,让 acme 去检查证书是否过期,即将过期是就会执行脚本自动更新
crontab -e

# 添加以下定时任务
10 0 * * * docker exec acme --cron >> /data/container/acme/acme_cron.log 2>&1
10 1 * * * docker restart nginx
每天零点十分,会检查 acme 证书是否快要过期,若符合,则会自动更新证书,并在 一点十分 重启 nginx 容器
然后 :wq 保存退出
使用 crontab -l 查看定时任务是否添加成功
修改 nginx
在 nginx 的 docker-compose.yml 中添加如下内容
services:
  nginx:
    volumes:
      - /data/container/acme/acme:/etc/nginx/ssl
然后停止 nginx 容器,重新启动,注意,由于更改是 docker compose,所以必须停止 nginx 容器,然后再使用 docker compose up -d 启动
修改 nginx 配置文件
server {
    listen 80;
    server_name jsonq.top www.jsonq.top;
    return 301 https://$host$request_uri;
}

server {
   listen 443 ssl;
   http2 on;
   server_name  jsonq.com www.jsonq.com;
  #  root         /usr/share/nginx/html;
   ssl_certificate "/etc/nginx/ssl/jsonq.top_ecc/jsonq.top.cer";
   ssl_certificate_key "/etc/nginx/ssl/jsonq.top_ecc/jsonq.top.key";
   ssl_session_cache shared:SSL:1m;
   ssl_session_timeout  10m;
   ssl_ciphers HIGH:!aNULL:!MD5;
   ssl_prefer_server_ciphers on;
   location / {
       root /usr/share/nginx/html;
       try_files $uri $uri/ /index.html;
       index  index.html index.htm;
   }
}
注意: ssl_certificate 这里指定的是 example.com.cer,指向此证书能满足大部分场景的基本使用,但是它不是一个完整的证书链。比如第三方网站访问此域名,可能会因为证书问题而出错,此时必须使用 fullchain.cer
重启 nginx 容器:docker restart nginx
DNS 解析
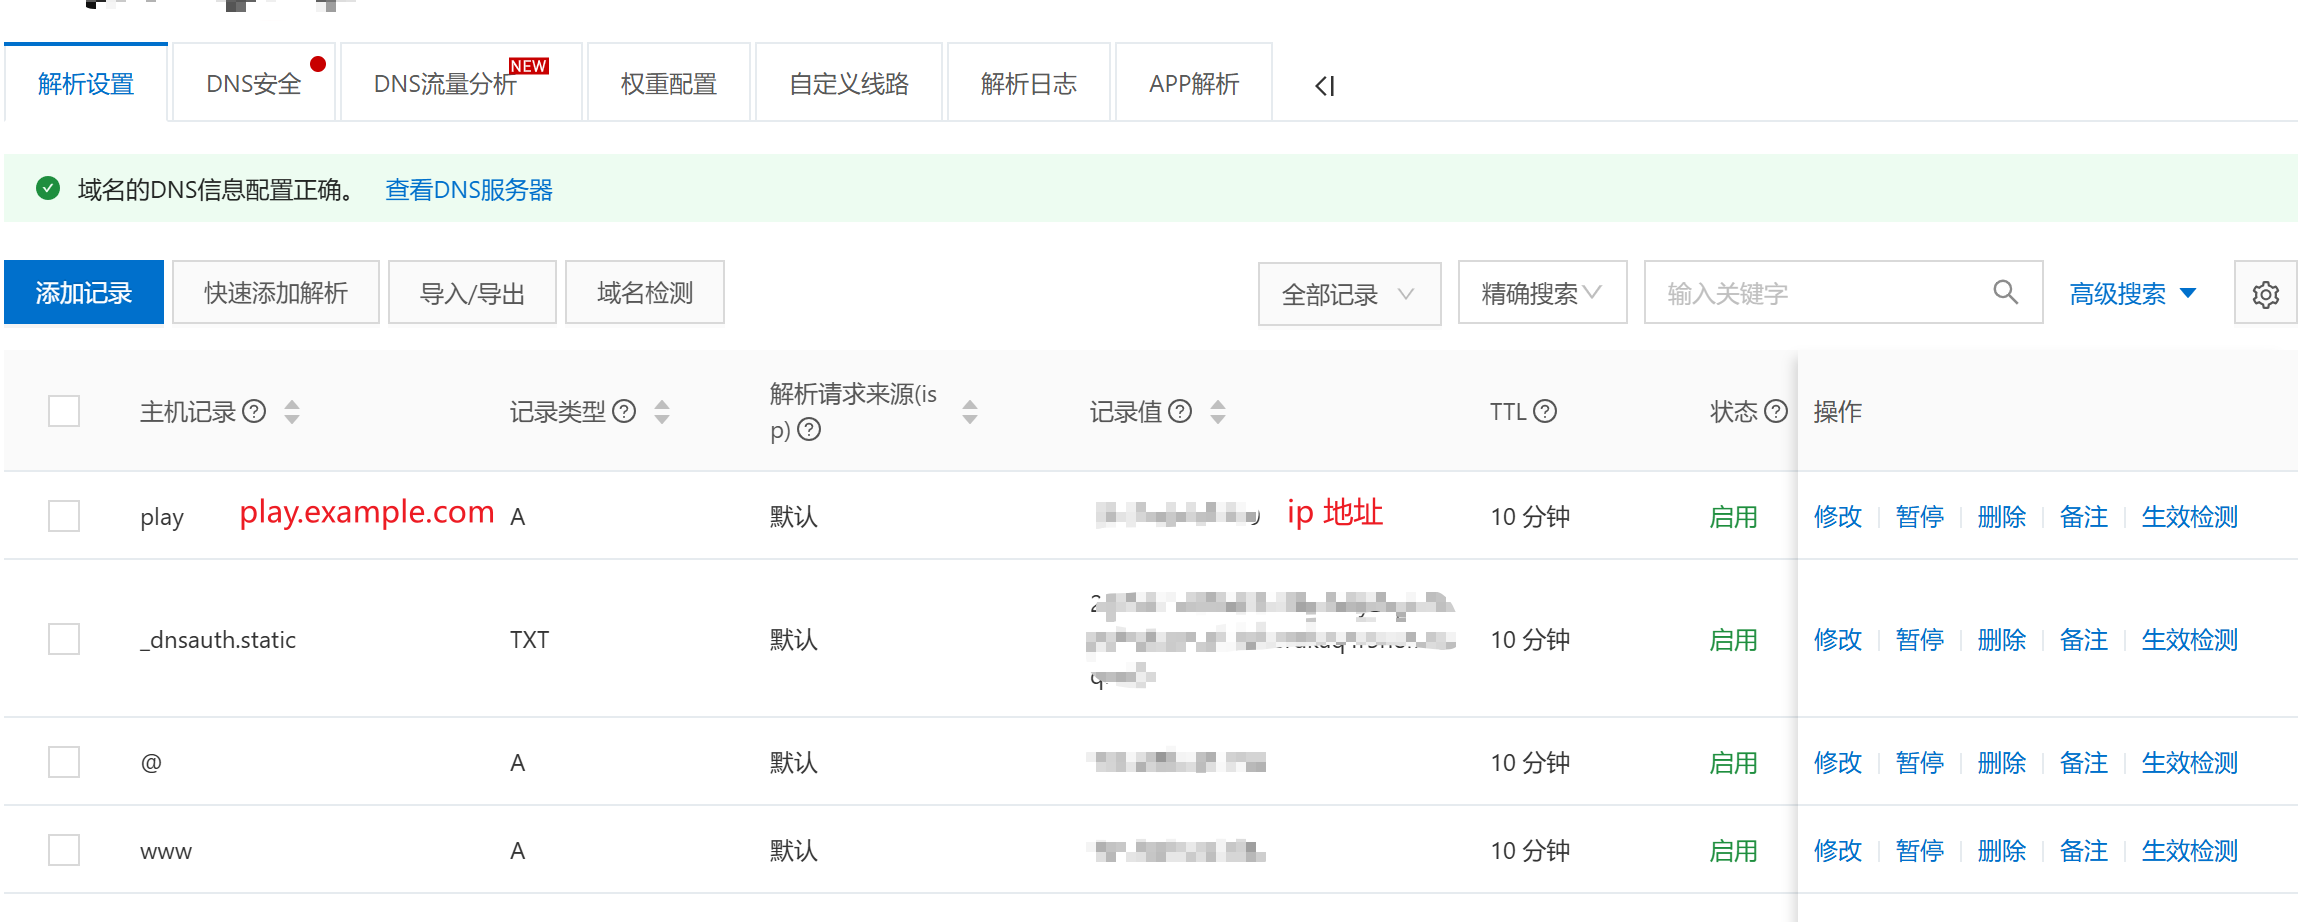
去域名的运营商那里对域名的 DNS 解析一下,一级域名 example.com,如果有二级域名,也都添加一下,域名级别解析的都是 A 记录,CNAME 是做域名转发(代理)的,以阿里云为例,大致如下所示:
访问域名验证正确性
此时访问 jsonq.top 应该就可以了,如果还是报不安全,建议去运营商的 ssl 管理后台去上传证书,这里以阿里云为例
- 证书文件 -
jsonq.top.cer - 证书私钥 -
jsonq.top.key - 证书链 -
ca.cer
nginx 和 minio 网络桥接
现在 minio 的容器和 nginx 的容器是互不干涉的,但是我有(泛)域名之后,想让 nginx 把这个域名代理到 minio。所以需要将两个容器的网络桥接起来,让两个容器共享网络
创建自定义网络桥接,个人不推荐让容器自动创建网络桥接,会导致管理混乱。
docker network create nginx-network查看现有的网络桥接列表
docker network ls删除 docker network rm xxx
minio 的 docker-compose.yml
name: "minio"
services:
  minio:
    networks:
      - nginx-network
networks:
  nginx-network:
    external: true
nginx 的 docker-compose.yml
services:
  nginx:
    networks:
      - nginx-network
networks:
  nginx-network:
    external: true
修改 nginx 的配置文件
server {
    listen 80;
    server_name minio.jsonq.top www.minio.jsonq.top;
    return 301 https://$host$request_uri;
}

server {
   listen 443 ssl;
   http2 on;
   server_name  minio.jsonq.top www.minio.jsonq.top;
   ssl_certificate "/etc/nginx/ssl/jsonq.top_ecc/jsonq.top.cer";
   ssl_certificate_key "/etc/nginx/ssl/jsonq.top_ecc/jsonq.top.key";
   ssl_session_cache shared:SSL:1m;
   ssl_session_timeout  10m;
   ssl_ciphers HIGH:!aNULL:!MD5;
   ssl_prefer_server_ciphers on;
   location / {
        proxy_pass http://minio:9999;
        proxy_set_header Host $http_host;
        proxy_set_header X-Real-IP $remote_addr;
        proxy_set_header X-Forwarded-For $proxy_add_x_forwarded_for;
        proxy_set_header X-Forwarded-Proto $scheme;

        # WebSocket 支持
        proxy_http_version 1.1;
        proxy_set_header Upgrade $http_upgrade;
        proxy_set_header Connection "upgrade";
    }
}
Nextjs
Nextjs 部署就不能直接像单页一样打个 dist 包扔服务器上了,整体流程就是根据像代码先构建镜像,就类似于 docker pull 拉取镜像一样,创建一个镜像,然后运行容器。
.dockerignore
Dockerfile
.dockerignore
node_modules
npm-debug.log
README.md
.next
.git
编写 Dockerfile 构建镜像
# 指定基础镜像版本,确保每次构建都是幂等的
FROM node:20-alpine AS base

FROM base AS builder

# Check https://github.com/nodejs/docker-node/tree/b4117f9333da4138b03a546ec926ef50a31506c3#nodealpine to understand why libc6-compat might be needed.
RUN apk add --no-cache libc6-compat

# Node v16.13 开始支持 corepack 用于管理第三方包管理器
# 锁定包管理器版本,确保 CI 每次构建都是幂等的
# RUN corepack enable && corepack prepare pnpm@latest --activate
# 这里指定了 pnpm 和本地开发的 pnpm 版本一致,防止出现跨版本的 break change
RUN corepack enable && corepack prepare pnpm@9.15.3 --activate

WORKDIR /app

# pnpm fetch does require only lockfile
# 注意还需要复制 `.npmrc`,因为里面可能包含 npm registry 等配置,下载依赖需要用到
# !!! 不存在的文件不要写入 COPY 命令中,不然镜像会构建失败
COPY package.json pnpm-lock.yaml ./

# 推荐使用 pnpm fetch 命令下载依赖到 virtual store,专为 docker 构建优化
# 参考:https://pnpm.io/cli/fetch
RUN pnpm fetch

# 将本地文件复制到构建上下文
COPY . .

# Uncomment the following line in case you want to disable telemetry during the build.
ENV NEXT_TELEMETRY_DISABLED 1

# 基于 virtual store 生成 node_modules && 打包构建
# 此处不需要与 package registry 进行通信,因此依赖安装速度极快
# 注意 PNPM v8.4.0 版本有一个 breaking change
# 当 `node_modules` 存在,运行 `pnpm install` 会出现命令行交互操作,导致 CI 挂掉
# 这里加上 `--force` 参数,关闭命令行交互操作
RUN pnpm install --offline --force && pnpm build

FROM base AS runner

# RUN apk update && apk add --no-cache git
RUN apk add --no-cache curl

# 如果需要是用 TZ 环境变量 实现时区控制,需要安装 tzdata 这个包
# debian 的基础镜像默认情况下已经安装了 tzdata,而 ubuntu 并没有
# RUN apk add --no-cache tzdata

ARG RUNTIME_ENV
ENV RUNTIME_ENV=$RUNTIME_ENV
ENV NODE_ENV production

# Docker 容器不推荐用 root 身份运行
# 这边先建立一个特定的用户和用户组,为它分配必要的权限,使用 USER 切换到这个用户
# 注意,如果不是 root 权限,对于可执行文件,需要修改权限,确保文件可以执行
RUN addgroup --system --gid 1001 nodejs
RUN adduser --system --uid 1001 nextjs

# 设置时区
# 在使用 Docker 容器时,系统默认的时区就是 UTC 时间(0 时区),和我们实际需要的北京时间相差八个小时
ENV LANG=en_US.UTF-8 LANGUAGE=en_US:en LC_ALL=en_US.UTF-8 TZ=Asia/Shanghai
RUN ln -snf /usr/share/zoneinfo/$TZ /etc/localtime && echo $TZ > /etc/timezone

WORKDIR /app

# PNPM 有一个全局 store,项目中的 node_modules 实际上是全局 store 的 symlink
# 正常需要从上一阶段同时复制 `node_modules` 和全局 store,这样才能正常运行
# 但是由于 `standalone` 目录里面包含所有运行时依赖,且都是独立目录
# 因此可以直接复制该目录,无需复制全局 store(如果复制还会增加镜像体积)
# 另外运行需要的配置文件、dotfile 也都在 `standalone` 目录里面,无需单独复制

# `standalone` 模式打包,默认包含服务端代码,没有客户端代码
# 因为官方建议通过 CDN 托管,但也可以手动复制 `public`、`.next/static` 目录
COPY --from=builder /app/public ./public
COPY --from=builder --chown=nextjs:nodejs /app/.next/standalone ./
COPY --from=builder --chown=nextjs:nodejs /app/.next/static ./.next/static

# 注意,`standalone` 目录下已经包含了服务端代码,无需再复制 `.next/server`
# COPY --from=builder /app/.next/server ./.next/server

USER nextjs

# Uncomment the following line in case you want to disable telemetry during runtime.
ENV NEXT_TELEMETRY_DISABLED 1
ENV PORT 3000

# 默认暴露 80 端口
EXPOSE 3000

# 用 standalone 模式打包后,生成的 `standalone/node_modules` 目录下缺少 `.bin` 目录
# 导致无法用 `next` 命令启动项目,但可以用 `node server.js` 启动
# 参考:https://nextjs.org/docs/advanced-features/output-file-tracing
CMD ["node", "server.js"]
Dockerfile 注意事项: 执行 COPY 命令时,COPY 的文件必须存在,否则 COPY 失败会导致镜像构建失败
使用
docker build -t nextjs .来构建镜像,其中nextjs就是镜像名,名字随便起只要能和项目的docker-compose使用的镜像名称保持一致即可。
编写 docker-compose 启动容器
services:
  app:
    build:
      context: .
      dockerfile: Dockerfile
    image: nextjs # docker build -t nextjs .
    container_name: blog
    ports:
      - 3000:3000
    networks:
      - nginx-network

networks:
  nginx-network:
external: truenginx-network就是自定义的网络桥接,由于 Nextjs 项目要通过 Nginx 代理,所以必须处于同一个网络桥段下,才能让各容器共享一个网络image: nextjs这里指定了刚才构建的镜像nextjs镜像,如果不指定,执行docker compose up -d时,Nextjs 会自动再依据Dockerfile重新构建一个镜像container_name: blog指定容器别名,nginx 代理时可以直接http://blog:3000即可代理到该容器的运行地址
配置 Nginx 代理
server {
    listen 80;
    server_name jsonq.top www.jsonq.top;
    return 301 https://$host$request_uri;
}

server {
   listen 443 ssl;
   http2 on;
   server_name  jsonq.top www.jsonq.top;
#    root         /usr/share/nginx/html;
   ssl_certificate "/etc/nginx/ssl/jsonq.top_ecc/jsonq.top.cer";
   ssl_certificate_key "/etc/nginx/ssl/jsonq.top_ecc/jsonq.top.key";
   ssl_session_cache shared:SSL:1m;
   ssl_session_timeout  10m;
   ssl_ciphers HIGH:!aNULL:!MD5;
   ssl_prefer_server_ciphers on;
   location / {
     #  root /usr/share/nginx/html;
     #  try_files $uri $uri/ /index.html;
     #  index  index.html index.htm;
        proxy_pass http://blog:3000;
        proxy_set_header Host $http_host;
        proxy_set_header X-Real-IP $remote_addr;
        proxy_set_header X-Forwarded-For $proxy_add_x_forwarded_for;
   }
}
配置完之后,直接重启 nginx 容器即可。
Github Action 实现 CI CD 自动化部署
此部分可以查看 Github Action CICD 自动部署,编写的 workflow 再往下看
编写 Github Action
在项目根目录新建 .github/workflows/deploy.yml 工作流文件
指定 main 分支发生 commit 变动时,会触发 workflow
on:
  push:
    branches: main

jobs:
  deploy:
    runs-on: ubuntu-latest
    steps:
      - name: Checkout code
        uses: actions/checkout@v4

      - name: Connect Server Deploy
        uses: appleboy/ssh-action@master
        with:
          host: ${{ secrets.SSH_HOST }}
          username: ${{ secrets.SSH_USER }}
          key: ${{ secrets.SSH_PRIVATE_KEY }}
          command_timeout: 20m
          script: |
            cd ${{ secrets.PATH_REMOTE }}
            MAX_RETRIES=8
            RETRY_COUNT=0

            while [ $RETRY_COUNT -lt $MAX_RETRIES ]; do
              echo "▶️ Attempt $((RETRY_COUNT+1))/$MAX_RETRIES: Pulling code..."
              if git pull origin main; then
                echo "✅ Git pull succeeded"
                docker stop blog || true
                docker rm blog || true
                docker rmi nextjs || true
                docker build -t nextjs .
                docker compose up -d
                exit 0
              else
                echo "❌ Git pull failed (attempt $((RETRY_COUNT+1))/$MAX_RETRIES)"
                ((RETRY_COUNT++))
                sleep 5
              fi
            done

            echo "🛑 Error: Failed to pull code after $MAX_RETRIES attempts"
            exit 1
使用 appleboy/ssh-action 连接远程服务器,连接成功后,执行脚本,即 script 部分。
command_timeout 修改为了 20 分钟,默认是 10 分钟,因为有 git pull 的错误重试机制,很容易超过 10 分钟,纯 Docker 构建都要 5 分钟左右
这部分内容其实很少,简单来说就是以下步骤:
- 拉取 GitHub 仓库的最新代码
- 停止容器,删除容器
- 停止镜像,删除镜像
为什么写了一大堆呢?其实就是 git pull 拉取代码失败后的重试机制,因为众所周知的问题,拉取 github 的代码经常失败(当时傻 Ⅹ 买了台国内服务器,结果自讨苦吃)
Nextjs 开发中的踩坑
本地 http 访问 https 图片
http 没法访问 https,目前这里有两种方法
- 在项目的
env中设置NODE_TLS_REJECT_UNAUTHORIZED=0绕过证书问题 - 使用 next cli,
next dev --experimental-https,这个命令在启动项目时生成一份证书临时使用
使用 next-auth 生成环境第三方授权出现 Server Error
环境变量设置 AUTH_TRUST_HOST=true,具体可查看 next-auth issues
容器部署的 Next 项目 next-auth 无法正确推断 redirect_uri
虽然 next-auth 官方说可以自动推断 redirect_uri,本地确实没问题,但是 Docker 部署后的 Next 项目推断失败(笑死)
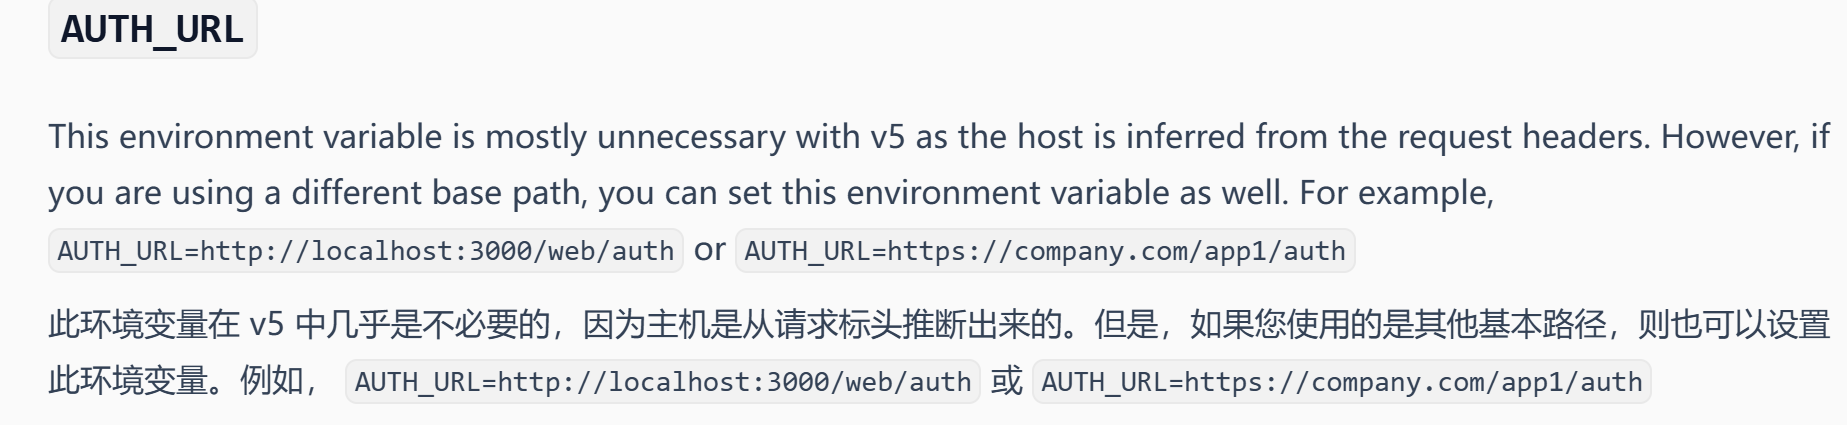
出现问题的时候,推断出来的 redirect_uri 是 https//: 容器id:容器端口,但是这种显然是无法公网访问的,而且和 Github 里配置的路径不一致,所以会出错,那就没办法了,就去 env 里明确一下呗
.env.development:AUTH_URL=http://localhost:3000/api/auth.env.production:AUTH_URL=https://example.com/api/auth
Postgresql
先上 docker-compose.yml 文件
services:
  postgres:
    image: postgres:17-alpine
    container_name: postgres
    environment:
      POSTGRES_USER: postgres # 管理员用户不设置默认 postgres
      POSTGRES_PASSWORD: 123456 # 密码
    ports:
      - "5432:5432"
    volumes:
      - ./data:/var/lib/postgresql/data
    restart: always
    healthcheck:
      test: ["CMD-SHELL", "pg_isready -U postgres"]
      interval: 5s
      timeout: 5s
      retries: 5

volumes:
  postgres_data:
然后 docker compose up -d 启动即可,安装 Postgresql 很简单,只是连接的话就会出问题了
这是通过 Navicat 连接 Postgresql 的报错
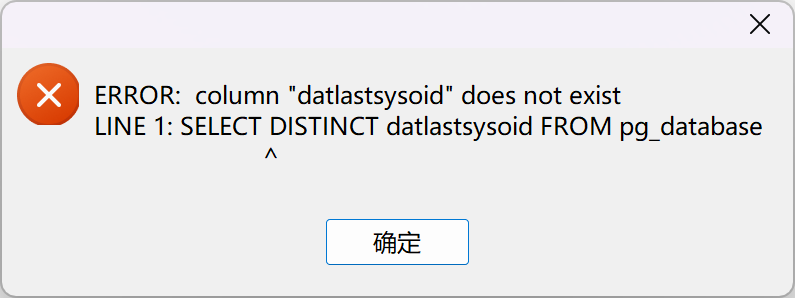
这个错误是因为 Postgres 从 15 开始,从 pg_database 表中删除了 datlastsysoid 字段引发此错误。
解决此问题的方式也有简单粗暴的,也有麻烦的:
- 升级 Navicat(目前 16 是不行的)
- 降低 Postgresql 的版本
- 修改 dll(采用方式)
修改 Navicat dll 以修复连接 Postgresql 错误的问题
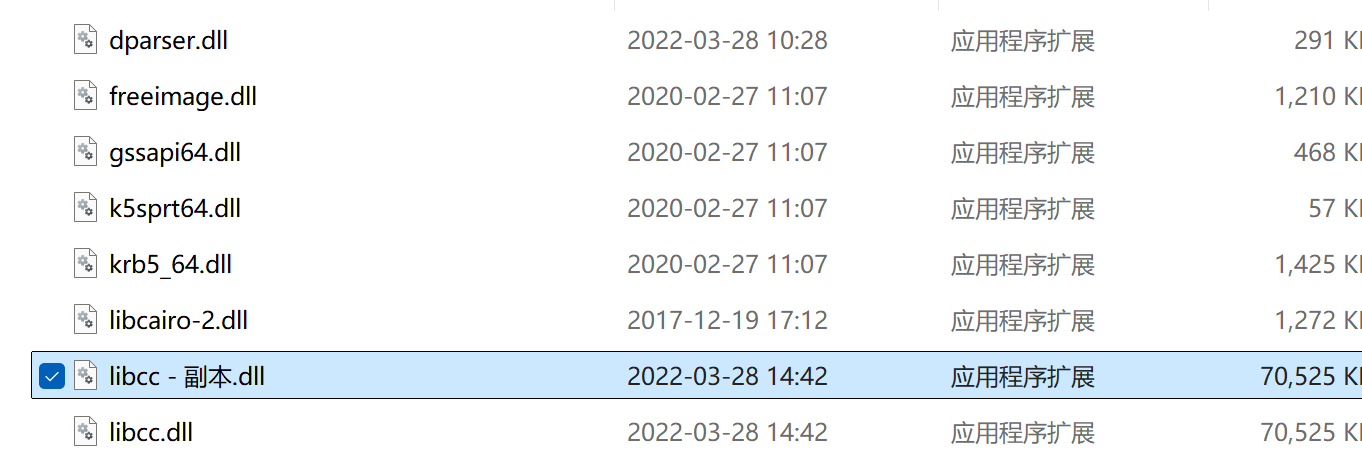
- 打开安装 Navicat 的文件夹,找到
libcc.dll文件
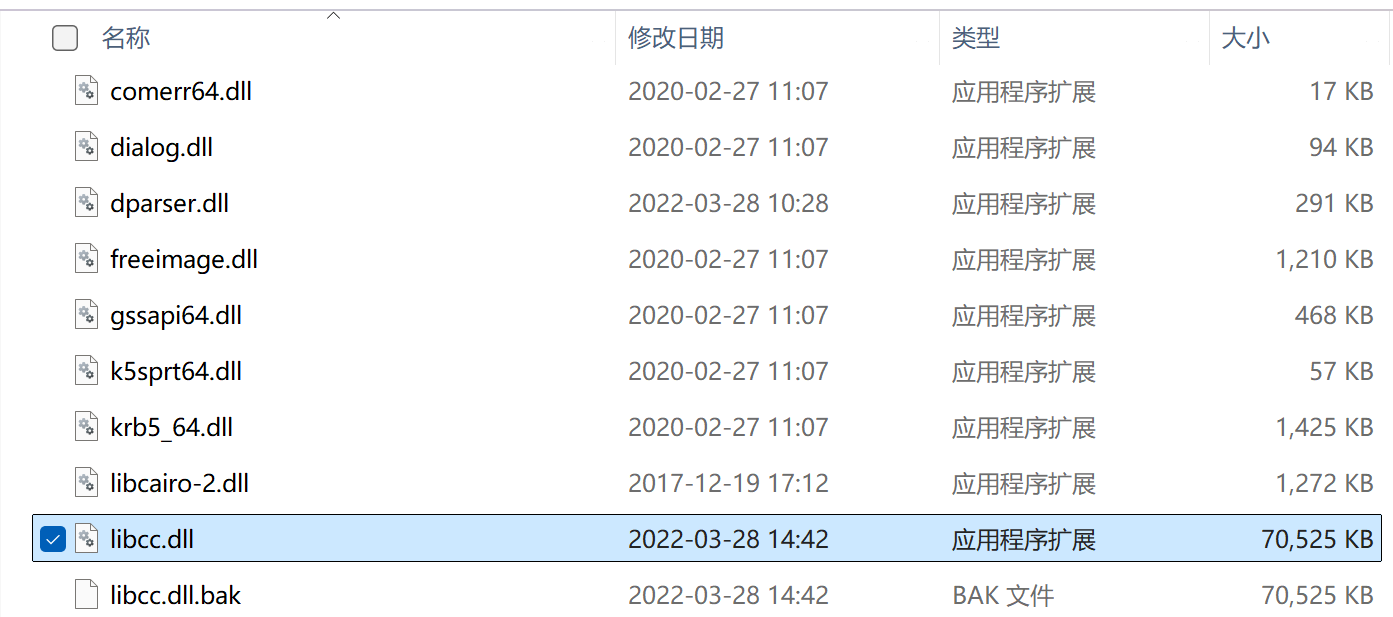
- 备份
libcc.dll文件,将其复制并粘贴改为任意名称(这里是为了以防万一搞炸了恢复用)
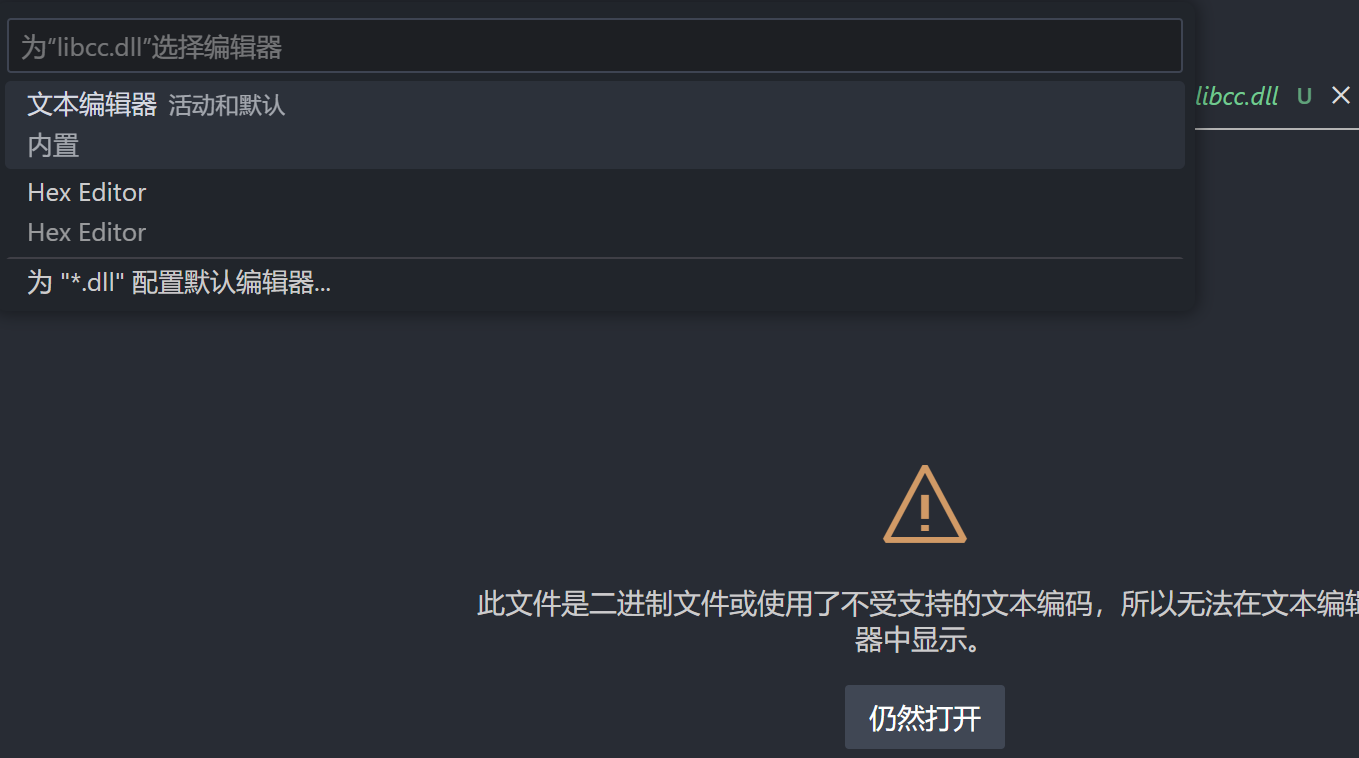
- 在任何十六进制编辑器中打开此文件,可使用在线工具,如 https://hexed.it ,这里使用 vscode 插件
Hex Editor - 将
libcc.dll使用 vscode 打开,使用Hex Editor插件预览
ctrl+f检索内容SELECT DISTINCT datlastsysoid
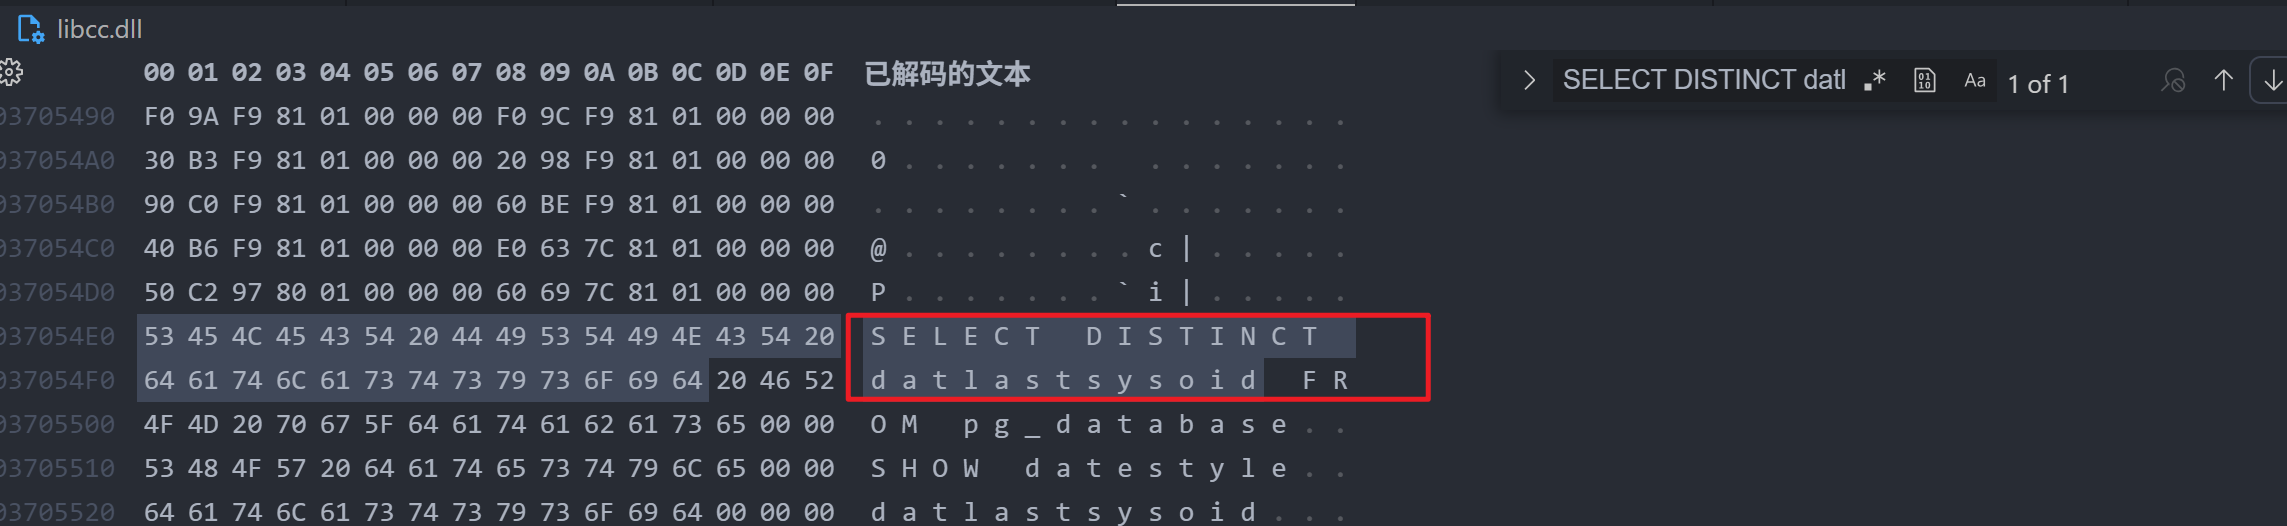
- 将
datlastsysoid替换为dattablespace
注意更改的时候,要切换 INS 模式,有光标变为插入才能正常替换内容
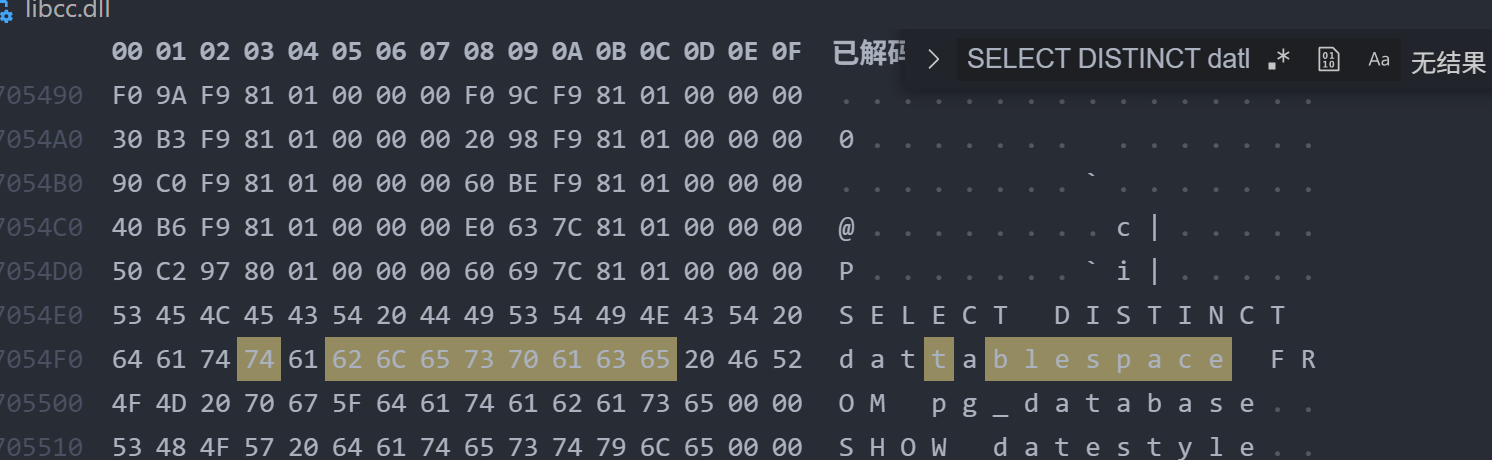
最终展示
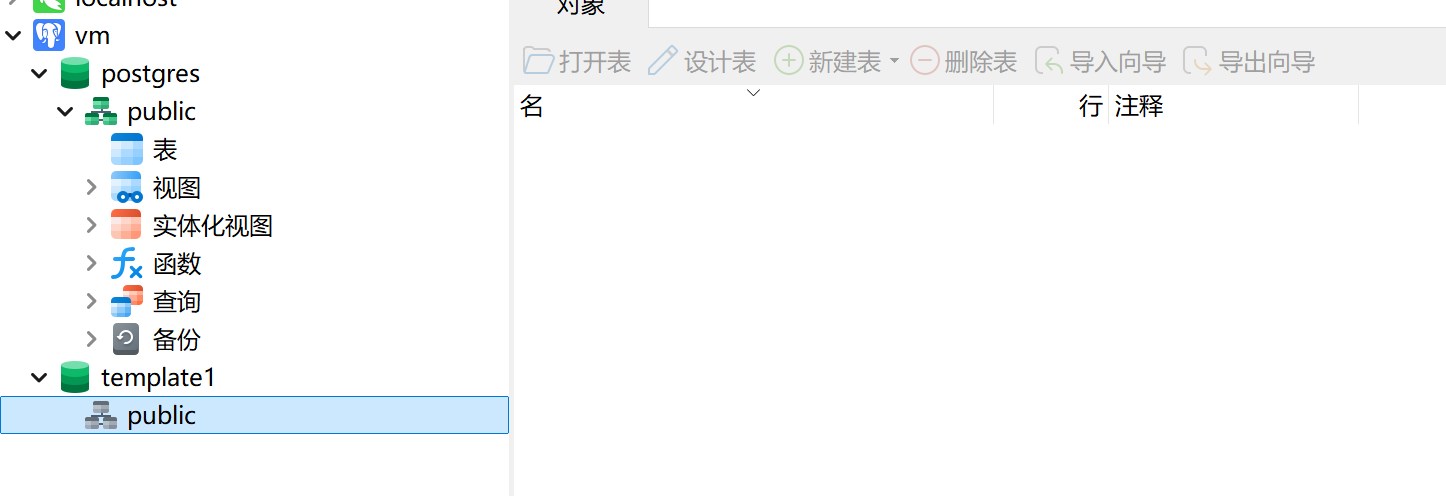
Redis
services:
  redis:
    image: redis:7-alpine
    container_name: redis
    ports:
      - "6379:6379"
    volumes:
      - ./data:/data
      - ./redis.conf:/usr/local/etc/redis/redis.conf
      - ./logs:/logs
    restart: always

volumes:
  redis_data:
Mysql
services:
  mysql:
    image: mysql:8
    container_name: mysql
    ports:
      - "3306:3306"
    environment:
      - MYSQL_ROOT_PASSWORD=123456
      - TZ=Asia/Shanghai
    volumes:
      - ./log:/var/log/mysql
      - ./data:/var/lib/mysql
      - ./conf.d:/etc/mysql/conf.d
    restart: always